ASP.NET MVC - Bootstrap
In this chapter, we will look at Bootstrap which is a front-end framework now included with ASP.NET and MVC. It is a popular front-end tool kit for web applications, and will help you build a user interface with HTML, CSS, and JavaScript.
It was originally created by web developers at Twitter for personal use, however, it is now an open source and has become popular with designers and developers because of its flexiblility and ease of use.
You can use Bootstrap to create an interface that looks good on everything from large desktop displays to small mobile screens. In this chapter, we will also look at how Bootstrap can work with your layout views to structure the look of an application.
Bootstrap provides all the pieces you need for layout, buttons, forms, menus, widgets, picture carousels, labels, badges, typography, and all sorts of features. Since Bootstrap is all HTML, CSS and JavaScript, all open standards, you can use it with any framework including ASP.NET MVC. When you start a new MVC project, Bootstrap will be present, meaning you'll find Bootstrap.css and Bootstrap.js in your project.
Let’s create a new ASP.NET Web Application.
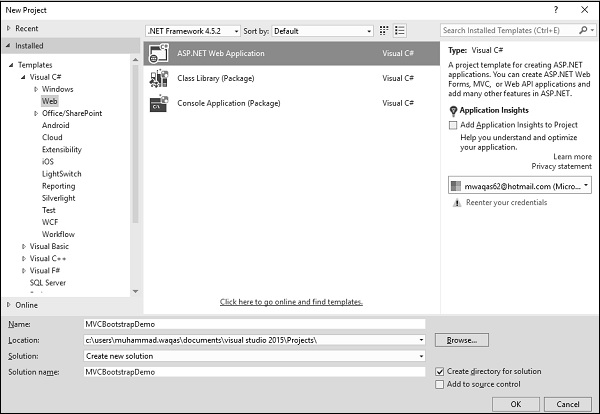
Enter the name of the project, let’s say ‘MVCBootstrap’ and click Ok. You will see the following dialog.
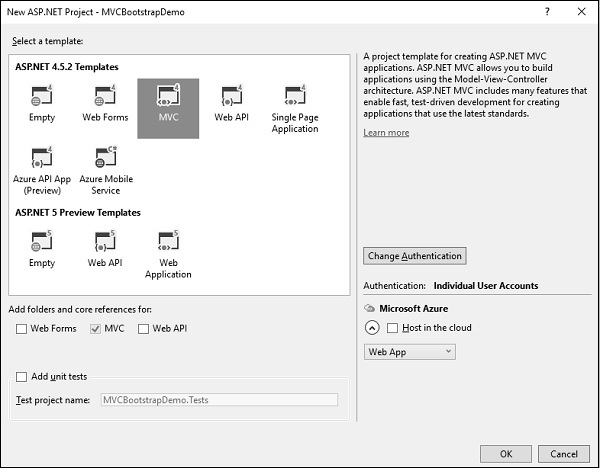
In this dialog, if you select the empty template, you will get an empty web application and there will be no Bootstrap present. There won't be any controllers or any other script files either.
Now select the MVC template and click Ok. When Visual Studio creates this solution, one of the packages that it will download and install into the project will be the Bootstrap NuGet package. You can verify by going to packages.config and you can see the Bootstrap version 3 package.
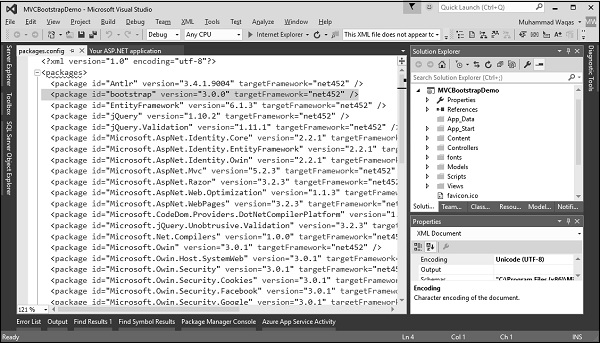
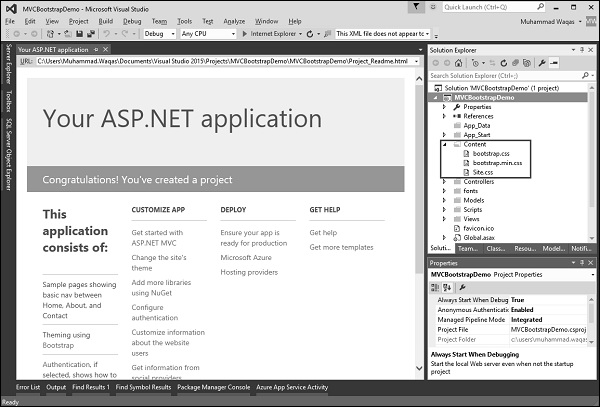
You can also see the Content folder which contains different css files.
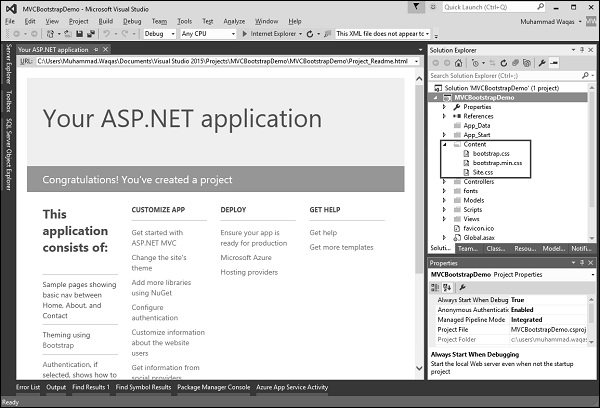
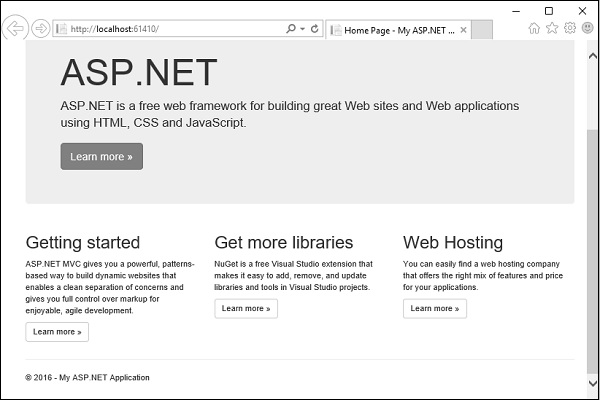
Run this application and you will see the following page.
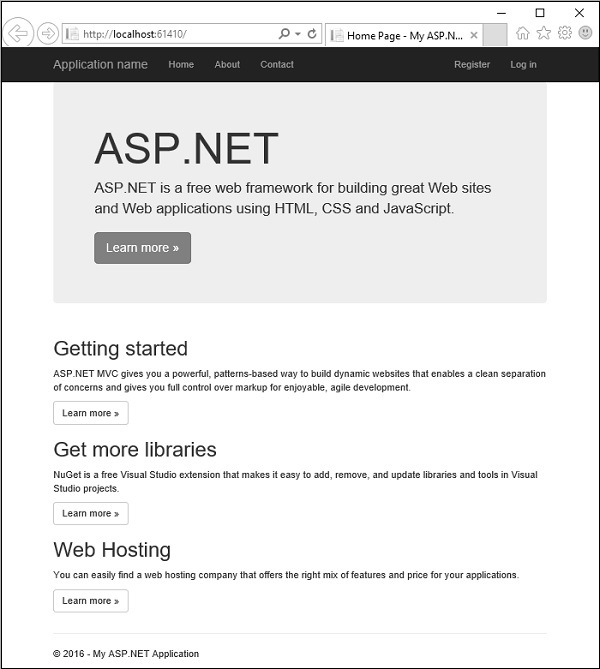
When this page appears, most of the layout and styling that you see is layout and styling that has been applied by Bootstrap. It includes the navigation bar at the top with the links as well as the display that is advertising ASP.NET. It also includes all of these pieces down about getting started and getting more libraries and web hosting.
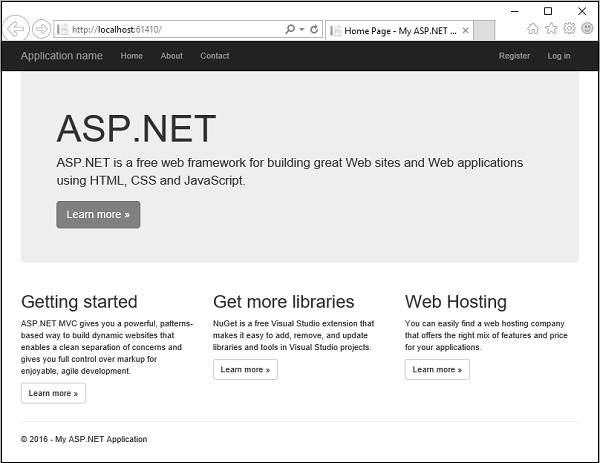
If you expand the browser just a little bit more, those will actually lay out side by side and that's part of Bootstrap's responsive design features.
If you look under the content folder, you will find the Bootstrap.css file.
The NuGet package also gives a minified version of that file that's a little bit smaller. Under scripts, you will find Bootstrap.js, that's required for some of the components of Bootstrap.
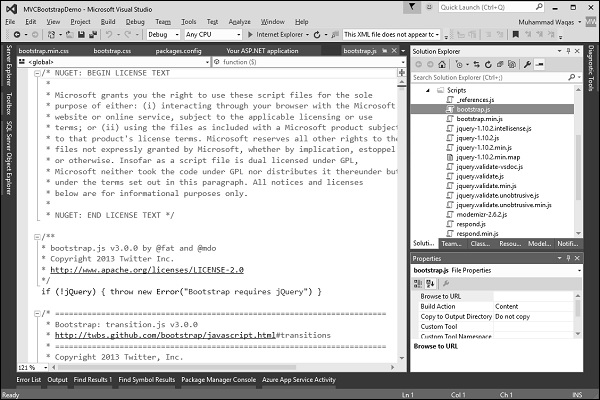
It does have a dependency on jQuery and fortunately jQuery is also installed in this project and there's a minified version of the Bootstrap JavaScript file.
Now the question is, where are all these added in the application? You might expect, that it would be in the layout template, the layout view for this project which is under View/Shared/_layout.cshtml.
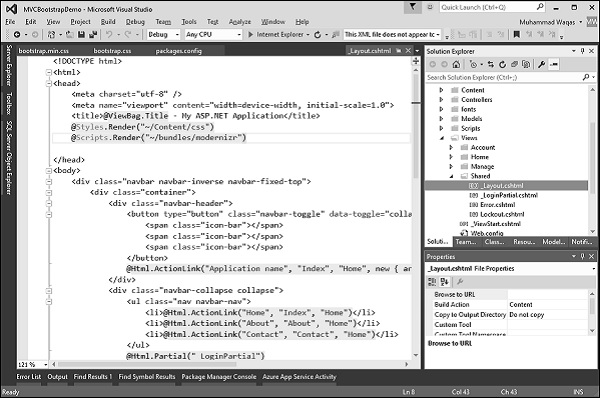
The layout view controls the structure of the UI. Following is the complete code in _layout.cshtml file.
<!DOCTYPE html>
<html>
   <head>
      <meta charset = "utf-8" />
      <meta name = "viewport" content = "width = device-width, initial-scale = 1.0">
      <title>@ViewBag.Title - My ASP.NET Application</title>
      @Styles.Render("~/Content/css")
      @Scripts.Render("~/bundles/modernizr")
   </head>

   <body>
      <div class = "navbar navbar-inverse navbar-fixed-top">
         <div class = "container">

            <div class = "navbar-header">
               <button type = "button" class = "navbar-toggle" datatoggle =
                  "collapse" data-target = ".navbar-collapse">
                  <span class = "icon-bar"></span>
                  <span class = "icon-bar"></span>
                  <span class = "icon-bar"></span>
               </button>

               @Html.ActionLink("Application name", "Index", "Home", new
                  { area = "" }, new { @class = "navbar-brand" })
            </div>

            <div class = "navbar-collapse collapse">
               <ul class = "nav navbar-nav">
                  <li>@Html.ActionLink("Home", "Index", "Home")</li>
                  <li>@Html.ActionLink("About", "About", "Home")</li>
                  <li>@Html.ActionLink("Contact", "Contact", "Home")</li>
               </ul>

               @Html.Partial("_LoginPartial")
            </div>

         </div>

      </div>
      <div class = "container body-content">
         @RenderBody()
         <hr />
         <footer>
            <p>© @DateTime.Now.Year - My ASP.NET Application</p>
         </footer>
      </div>

      @Scripts.Render("~/bundles/jquery")
      @Scripts.Render("~/bundles/bootstrap")
      @RenderSection("scripts", required: false)

   </body>
</html>
In the above code there are two things to note. First at the top, after <title> you will see the following line of code.
@Styles.Render("~/Content/css")
The Styles.Render for Content/css is actually where the Bootstrap.css file is going to be included, and at the bottom, you will see the following line of code.
@Scripts.Render("~/bundles/bootstrap")
It is rendering the Bootstrap script. So in order to find out what exactly is inside of these bundles, we'll have to go into the BundleConfig file, which is in App_Start folder.
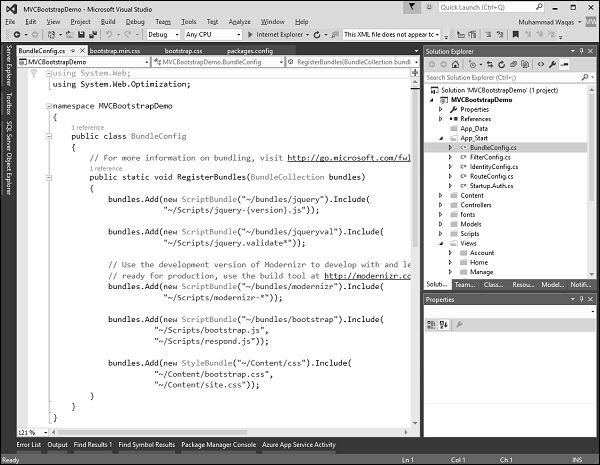
In BundleConfig, you can see at the bottom that the CSS bundle includes both Bootstrap.css and our custom site.css.
bundles.Add(new StyleBundle("~/Content/css").Include(
   "~/Content/bootstrap.css",
   "~/Content/site.css"));
It is a place where we can add our own style sheets to customize the look of the application. You can also see the Bootstrap bundle that appears before the CSS bundle that includes Bootstrap.js, and another JavaScript file, respond.js.
bundles.Add(new ScriptBundle("~/bundles/bootstrap").Include(
   "~/Scripts/bootstrap.js",
   "~/Scripts/respond.js"));
Let’s comment Bootstrap.css as shown in the following code.
bundles.Add(new StyleBundle("~/Content/css").Include(
   //"~/Content/bootstrap.css",
   "~/Content/site.css"));
Run this application again, just to give you an idea of what Bootstrap is doing, because now the only styles that are available are the styles that are in site.css.
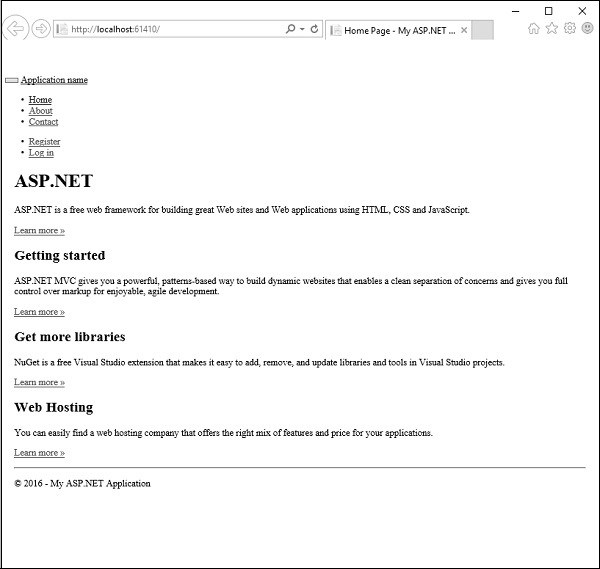
As you can see we lost the layout, the navigation bar at the top of the page. Now everything looks ordinary and boring.
Let us now see what Bootstrap is all about. There's a couple of things that Bootstrap just does automatically and there's a couple of things that Bootstrap can do for you when you add classes and have the right HTML structure. If you look at the _layout.cshtml file, you will see the navbar class as shown in the following code.
<div class = "navbar navbar-inverse navbar-fixed-top">
   <div class = "container">

      <div class = "navbar-header">
         <button type = "button" class = "navbar-toggle" datatoggle =
            "collapse" data-target = ".navbar-collapse">
            <span class = "icon-bar"></span>
            <span class = "icon-bar"></span>
            <span class = "icon-bar"></span>
         </button>
         <a class = "navbar-brand" href = "/">Application name</a>
      </div>

      <div class = "navbar-collapse collapse">
         <ul class = "nav navbar-nav">
            <li><a href = "/">Home</a></li>
            <li><a href = "/Home/About">About</a></li>
            <li><a href = "/Home/Contact">Contact</a></li>
         </ul>

         <ul class = "nav navbar-nav navbar-right">
            <li><a href = "/Account/Register" id = "registerLink">Register</a></li>
            <li><a href = "/Account/Login" id = "loginLink">Log in</a></li>
         </ul>

      </div>

   </div>

</div>
It is CSS classes from Bootstrap like navbar, navbar inverse, and navbar fixed top. If you remove a few of these classes like navbar inverse, navbar fixed top and also uncomment the Bootstrap.css and then run your application again, you will see the following output.
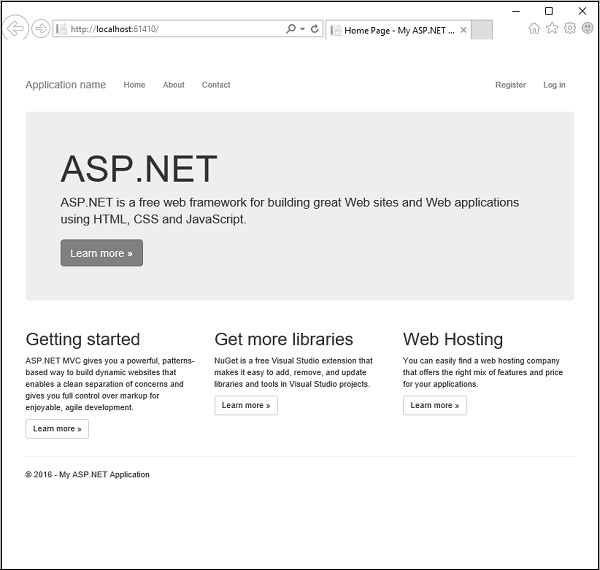
You will see that we still have a navbar, but now it's not using inverse colors so it's white. It also doesn't stick to the top of the page. When you scroll down, the navigation bar scrolls off the top and you can no longer see it again.
No comments:
Post a Comment