ASP.NET MVC - Razor
In this chapter, we will look at the Razor view engine in ASP.NET MVC applications and some of the reasons why Razor exists. Razor is a markup syntax that lets you embed server-based code into web pages using C# and VB.Net. It is not a programming language. It is a server side markup language.
Razor has no ties to ASP.NET MVC because Razor is a general-purpose templating engine. You can use it anywhere to generate output like HTML. It's just that ASP.NET MVC has implemented a view engine that allows us to use Razor inside of an MVC application to produce HTML.

You will have a template file that's a mix of some literal text and some blocks of code. You combine that template with some data or a specific model where the template specifies where the data is supposed to appear, and then you execute the template to generate your output.
Razor Vs ASPX
- Razor is very similar to how ASPX files work. ASPX files are templates, which contain literal text and some C# code that specifies where your data should appear. We execute those to generate the HTML for our application.
- ASPX files have a dependency on the ASP.NET runtime to be available to parse and execute those ASPX files. Razor has no such dependencies.
- Unlike ASPX files, Razor has some different design goals.
Goals
Microsoft wanted Razor to be easy to use and easy to learn, and work inside of tools like Visual Studio so that IntelliSense is available, the debugger is available, but they wanted Razor to have no ties to a specific technology, like ASP.NET or ASP.NET MVC.
If you're familiar with the life cycle of an ASPX file, then you're probably aware that there's a dependency on the ASP.NET runtime to be available to parse and execute those ASPX files. Microsoft wanted Razor to be smart, to make a developer's job easier.
Let’s take a look at a sample code from an ASPX file, which contains some literal text. This is our HTML markup. It also contains little bits of C# code.
<% foreach (var item in Model) { %>
   <tr>
      <td>
         <%: Html.ActionLink("Edit", "Edit", new { id = item.ID })%> |
         <%: Html.ActionLink("Details", "Details", new { id = item.ID }) %>|
         <%: Html.ActionLink("Delete", "Delete", new { id = item.ID })%>
      </td>

      <td>
         <%: item.Name %>
      </td>

      <td>
         <%: String.Format("{0,g}", item.JoiningDate) %>
      </td>

   </tr>
<%}%>
But these Web forms were basically repurposed by Microsoft to work with the earlier releases of MVC, meaning ASPX files were never a perfect match for MVC.
The syntax is a bit clunky when you need to transition from C# code back to HTML and from HTML code back into C# code. You are also prompted by IntelliSense to do things that just don't make sense in an MVC project, like add directives for output caching and user controls into an ASPX view.
Now look at this code which produces the same output, the difference being it is using the Razor syntax.
@foreach (var item in Model) {
   <tr>
      <td>
         @Html.ActionLink("Edit", "Edit", new { id = item.ID }) |
         @Html.ActionLink("Details", "Details", new { id = item.ID }) |
         @Html.ActionLink("Delete", "Delete", new { id = item.ID })
      </td>

      <td>
         @item.Name
      </td>

      <td>
         @String.Format("{0,g}", item.JoiningDate)
      </td>
   </tr>
}
With Razor syntax you can begin a bit of C# code by using the ‘@’ sign and the Razor parse will automatically switch into parsing this statement, this foreach statement, as a bit of C# code.
But when we're finished with the foreach statement and we have our opening curly brace, we can transition from C# code into HTML without putting an explicit token in there, like the percent in the angle bracket signs.
The Razor parser is smart enough to switch between C# code and HTML and again, from HTML back into C# code when we need to place our closing curly brace here. If you compare these two blocks of code, I think you'll agree that the Razor version is easier to read and easier to write.
Creating a View Using Razor
Let's create a new ASP.Net MVC project.
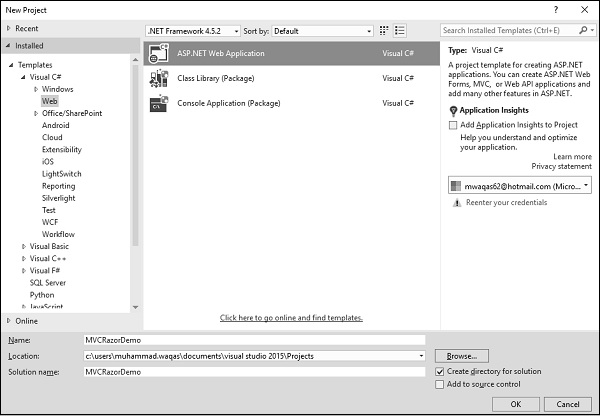
Enter the name of project in the name field and click Ok.
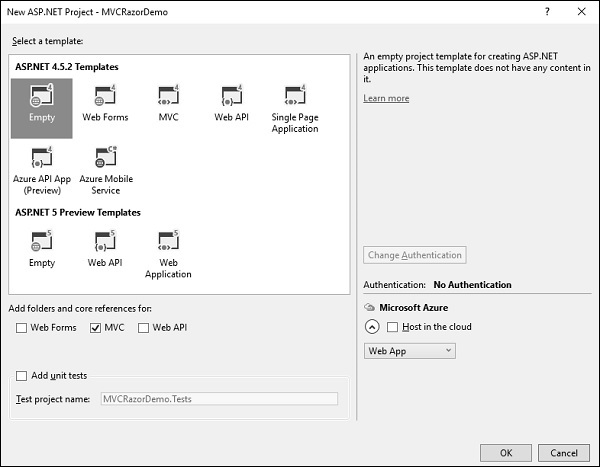
To keep things simple, select the Empty option and check the MVC checkbox in the ‘Add folders and core references for’ section and click Ok. It will create a basic MVC project with minimal predefined content.
Once the project is created by Visual Studio, you will see a number of files and folders displayed in the Solution Explorer window. As we have created ASP.Net MVC project from an empty project template, so at the moment the application does not contain anything to run. Since we start with an empty application and don't even have a single controller, let’s add a HomeController.
To add a controller right-click on the controller folder in the solution explorer and select Add → Controller. It will display the Add Scaffold dialog.
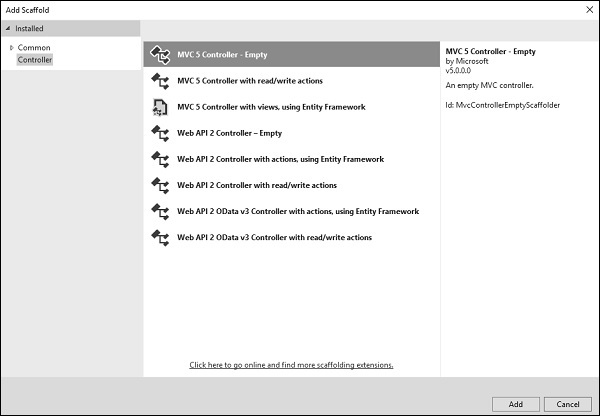
Select the MVC 5 Controller – Empty option and click Add button and then the Add Controller dialog will appear.

Set the name to HomeController and click ‘Add’ button. You will see a new C# file ‘HomeController.cs’ in the Controllers folder, which is open for editing in Visual Studio as well.
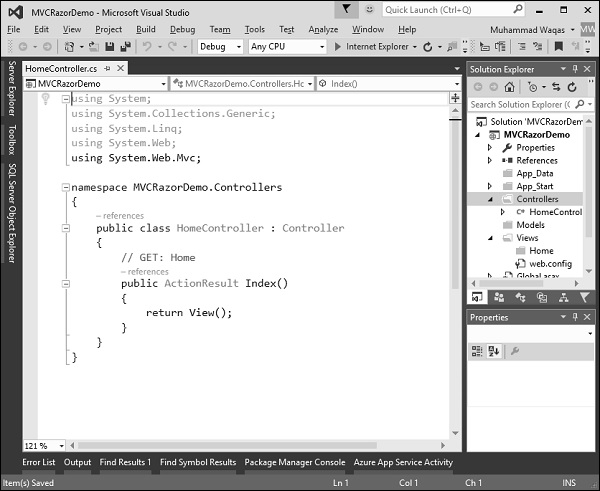
Right-click on the Index action and select Add View…
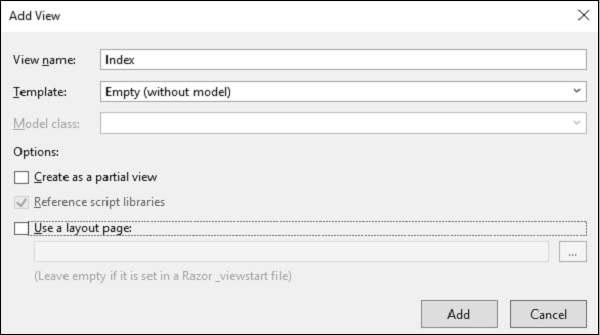
Select Empty from the Template dropdown and click Add button. Visual Studio will create an Index.cshtml file inside the View/Home folder.
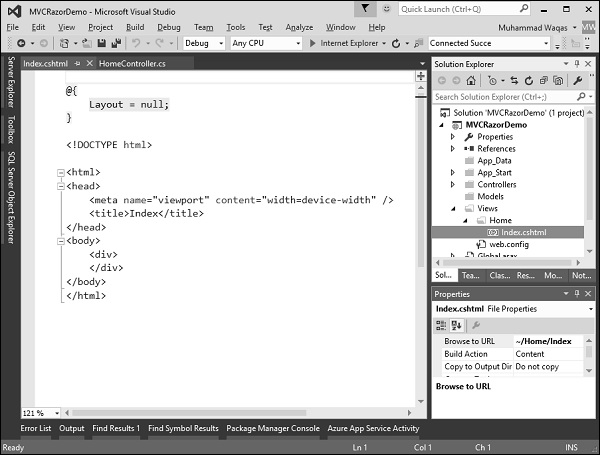
Notice that Razor view has a cshtml extension. If you're building your MVC application using Visual Basic it will be a VBHTML extension. At the top of this file is a code block that is explicitly setting this Layout property to null.
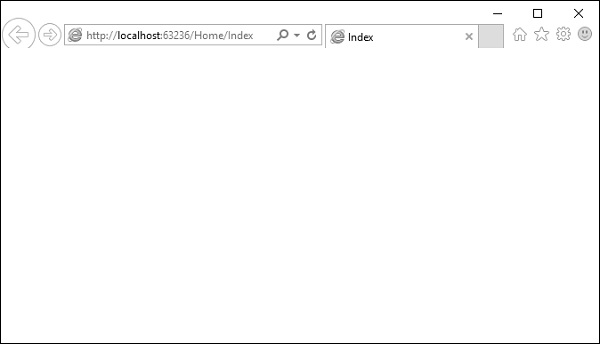
When you run this application you will see the blank webpage because we have created a View from an Empty template.
Let's add some C# code to make things more interesting. To write some C# code inside a Razor view, the first thing we will do is type the ‘@’ symbol that tells the parser that it is going to be doing something in code.
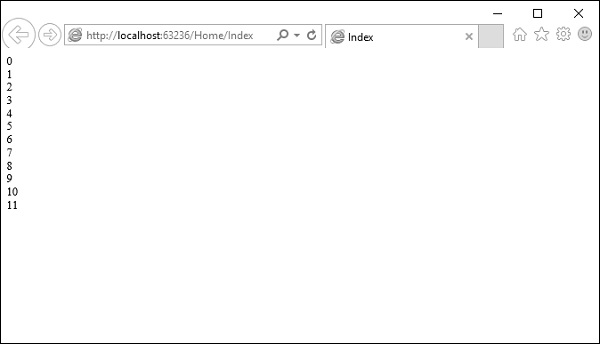
Let's create a FOR loop specify ‘@i’ inside the curly braces, which is essentially telling Razor to put the value of i.
@{
   Layout = null;
}

<!DOCTYPE html>
<html>
   <head>
      <meta name = "viewport" content = "width = device-width" />
      <title>Index</title>
   </head>

   <body>
      <div>
         @for (int index = 0; index < 12; index++){
            <div>@index </div>
         }
      </div>
   </body>

</html>
Run this application and you will see the following output.
No comments:
Post a Comment