MS SQL Server - Installation
SQL Server supports two types of installation −
- Standalone
- Cluster based
Checks
- Check RDP access for the server.
- Check OS bit, IP, domain of server.
- Check if your account is in admin group to run setup.exe file.
- Software location.
Requirements
- Which version, edition, SP and hotfix if any.
- Service accounts for database engine, agent, SSAS, SSIS, SSRS, if any.
- Named instance name if any.
- Location for binaries, system, user databases.
- Authentication mode.
- Collation setting.
- List of features.
Pre-requisites for 2005
- Setup support files.
- .net framework 2.0.
- SQL Server native client.
Pre-requisites for 2008&2008R2
- Setup support files.
- .net framework 3.5 SP1.
- SQL Server native client.
- Windows installer 4.5/later version.
Pre-requisites for 2012&2014
- Setup support files.
- .net framework 4.0.
- SQL Server native client.
- Windows installer 4.5/later version.
- Windows PowerShell 2.0.
Installation Steps
Step 1 − Download the Evaluation Edition from http://www.microsoft.com/download/en/details.aspx?id=29066
Once the software is downloaded, the following files will be available based on your download (32 or 64 bit) option.
ENU\x86\SQLFULL_x86_ENU_Core.box
ENU\x86\SQLFULL_x86_ENU_Install.exe
ENU\x86\SQLFULL_x86_ENU_Lang.box
OR
ENU\x86\SQLFULL_x64_ENU_Core.box
ENU\x86\SQLFULL_x64_ENU_Install.exe
ENU\x86\SQLFULL_x64_ENU_Lang.box
Note − X86 (32 bit) and X64 (64 bit)
Step 2 − Double-click the “SQLFULL_x86_ENU_Install.exe” or “SQLFULL_x64_ENU_Install.exe”, it will extract the required files for installation in the“SQLFULL_x86_ENU” or “SQLFULL_x86_ENU” folder respectively.
Step 3 − Click the “SQLFULL_x86_ENU” or “SQLFULL_x64_ENU_Install.exe” folder and double-click “SETUP” application.
For understanding, here we have used SQLFULL_x64_ENU_Install.exe software.
Step 4 − Once we click on 'setup' application, the following screen will open.

Step 5 − Click Installation which is on the left side of the above screen.

Step 6 − Click the first option of the right side seen on the above screen. The following screen will open.
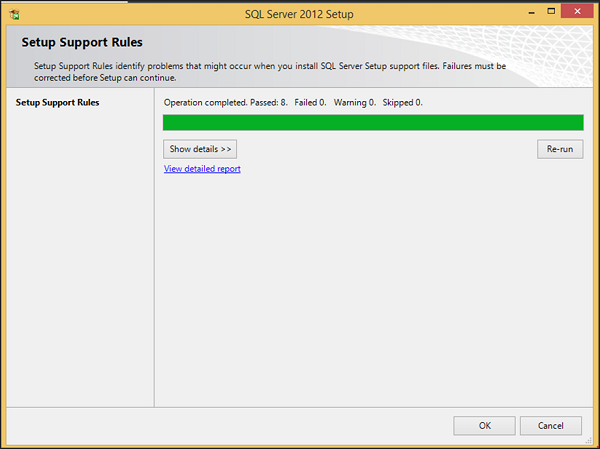
Step 7 − Click OK and the following screen pops up.
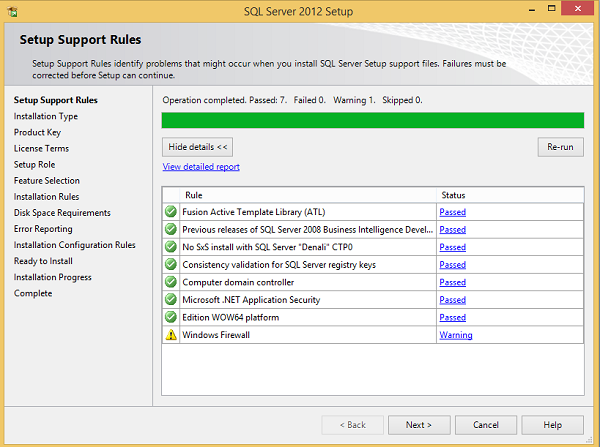
Step 8 − Click Next to get the following screen.
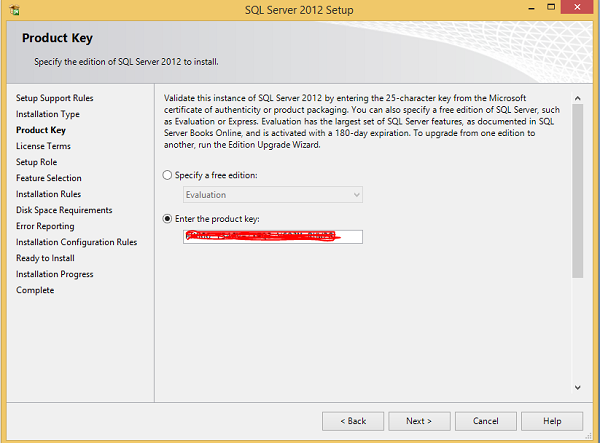
Step 9 − Make sure to check the product key selection and click Next.
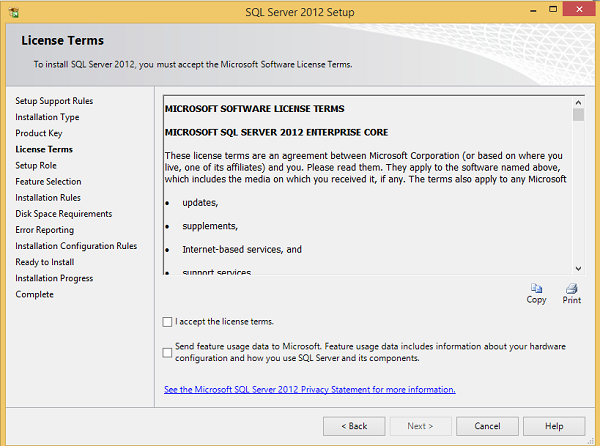
Step 10 − Select the checkbox to accept the license option and click Next.
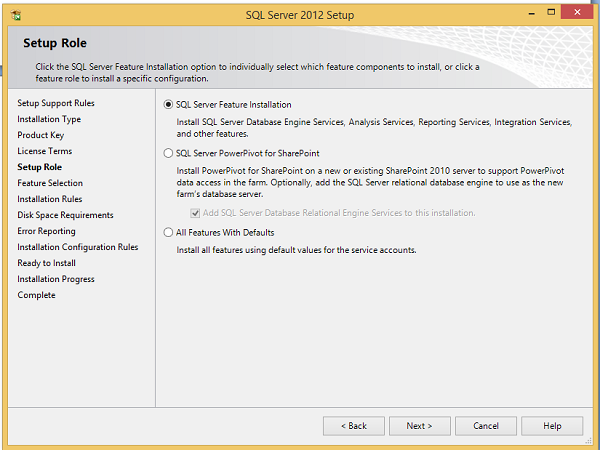
Step 11 − Select SQL Server feature installation option and click Next.
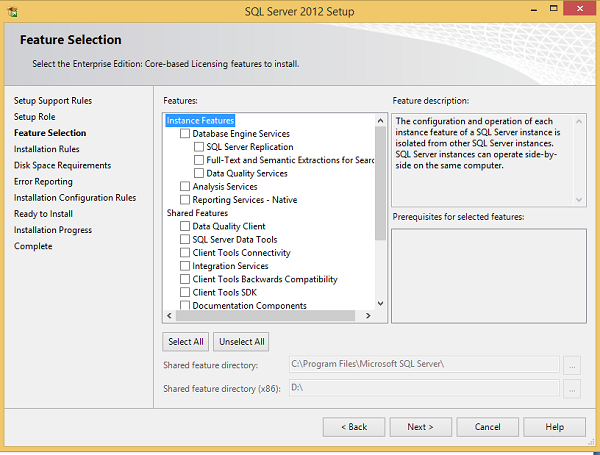
Step 12 − Select Database engine services checkbox and click Next.
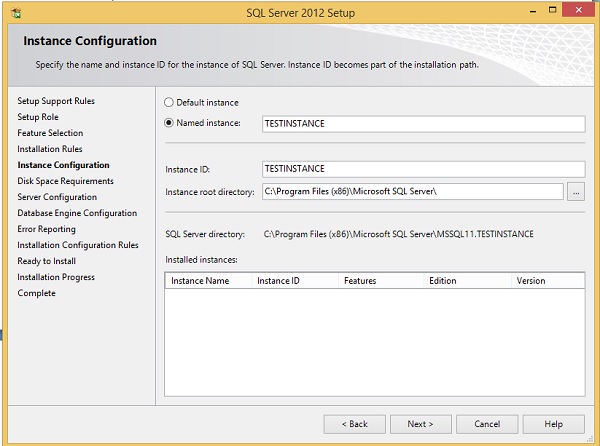
Step 13 − Enter the named instance (here I used TestInstance) and click Next.
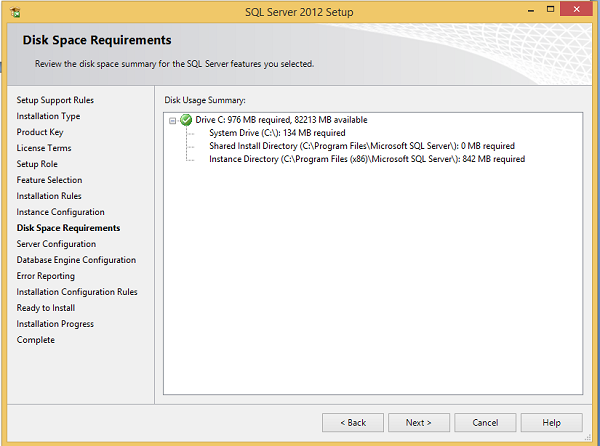
Step 14 − Click Next on the above screen and the following screen appears.

Step 15 − Select service account names and start-up types for the above listed services and click Collation.

Step 16 − Make sure the correct collation selection is checked and click Next.
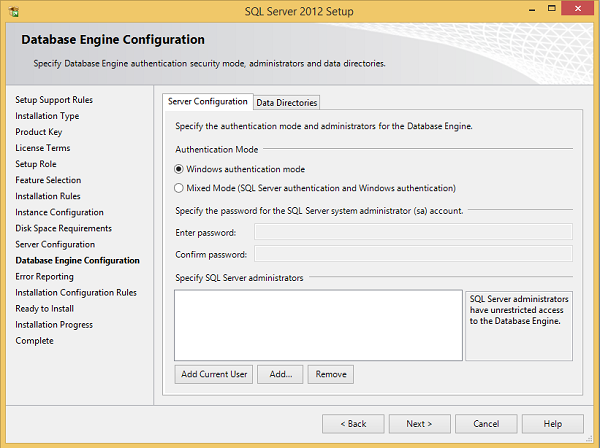
Step 17 − Make sure authentication mode selection and administrators are checked and click Data Directories.
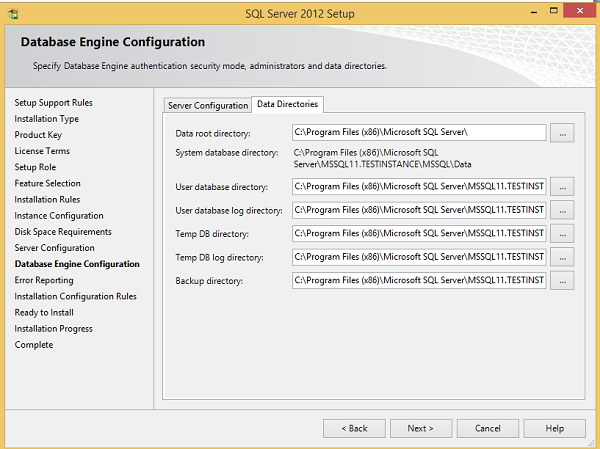
Step 18 − Make sure to select the above directory locations and click Next. The following screen appears.
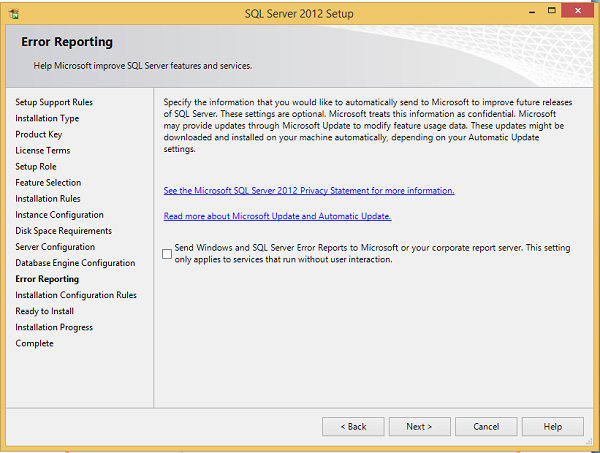
Step 19 − Click Next on the above screen.
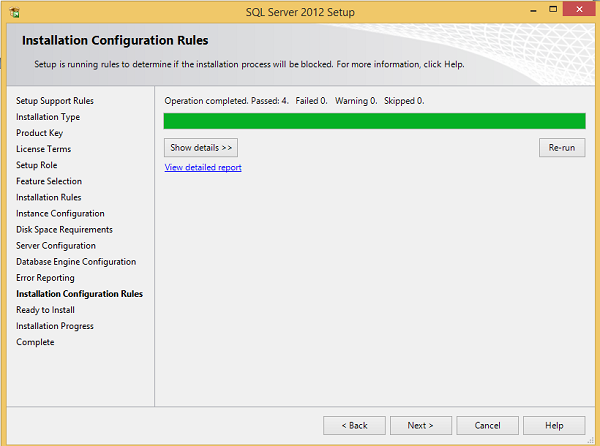
Step 20 − Click Next on the above screen to the get the following screen.
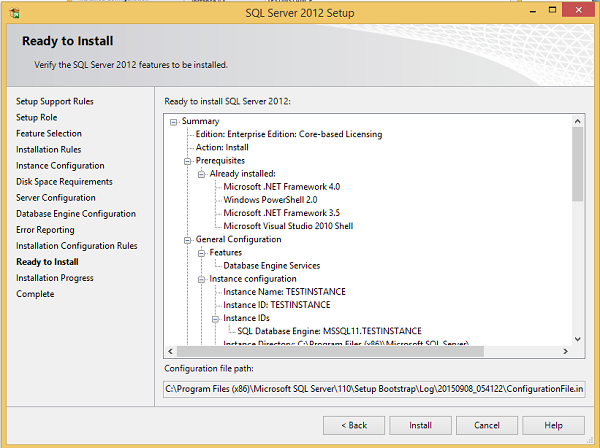
Step 21 − Make sure to check the above selection correctly and click Install.

Installation is successful as shown in the above screen. Click Close to finish.
Nice article.
ReplyDeleteFor regular update about latest technologies
www.dotnetbasic.com